Overview
EnforceDNS for ConnectWise PSA enables security operations teams and MSPs to automatically generate service tickets in ConnectWise PSA when threats are detected by EnforceDNS. This integration ensures your team can immediately act on security events from within your existing workflows, helping you detect, triage, and resolve incidents faster.
Prerequisites
-
Admin access to ConnectWise PSA
-
EnforceDNS administrator account
-
API Member credentials created in ConnectWise PSA
-
An available Service Board in ConnectWise PSA for security alerts
Configuration
Initial configuration is made simple by EnforceDNS’s self-service integration. Follow along as we guide you through the process.
Instructions assume a ConnectWise account has already been set up and configured. Please visit https://docs.connectwise.com/ if you have questions on how to complete the set up of your ConnectWise Account.
ConnectWise API Configuration
This outlines the required permissions for API endpoints used in EnforceDNS integration with ConnectWise PSA. Ensure the API member's security role includes these permissions to access and interact with the specified endpoints.
Permissions Breakdown
|
Enpoint |
Module |
Function |
Permission Level |
|---|---|---|---|
|
GET /system/mySecurity (read) |
System |
Member Maintenance |
Inquire (All) |
|
GET /company/companies (read) |
Companies |
Company Maintenance |
Inquire (All) |
|
GET /service/info/boards (read) |
Service Desk |
Service Tickets |
Inquire (All) |
|
GET /service/priorities (read) |
System |
Table Setup |
Inquire (All) |
|
GET /service/boards/{parentId}/types (read) |
System |
Table Setup |
Inquire (All) |
|
GET /service/boards/{parentId}/statuses (read) |
System |
Table Setup |
Inquire (All) |
|
POST /service/tickets (write) |
Service Desk |
Service Tickets |
Add (All) |
Step-by-Step Instructions: Setting Up Permissions
-
Log in to ConnectWise PSA: Access the admin console with sufficient permissions to modify roles.
-
Create or Edit a Security Role: Navigate to System > Security Roles, then create a new role or edit
an existing one. -
Assign Required Permissions: Use the table above to set up the necessary permissions:
-
Module: Ensure the correct module (e.g., System, Companies, Service Desk) is selected.
-
Function: Assign the appropriate function (e.g., Member Maintenance, Service Tickets).
-
Permission Level: Grant the required level, either Inquire (All) or Add (All).
-
-
Save the Role: Once the permissions are configured, save the role.
-
Assign the Role to the API Member: Go to System > Members, locate the API member, and assign the security role.
-
After saving your changes to the API member, go to the API Keys tab to create your API key pair.
-
Navigate to Settings>Members and then select the user you wish to view or generate an API key for.
-
Select the ‘API Keys tab’
-
Click ‘+' to create a new API Key or view your existing API Key (public only) under 'Public API Key’.
-
-
Test API Access: Use the API member credentials to test the endpoints and ensure they work as
expected.
Inquire (All) grants read-only access.
Add (All) allows the creation of new records.
Permissions should be reviewed and updated regularly to maintain security compliance
HYAS Setup
-
Navigate to apps.hyas.com to login to HYAS.
-
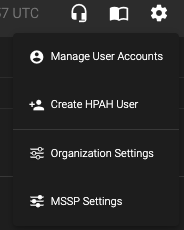
Click on the settings icon in the top right of the screen and navigate to ‘MSSP Settings’
-
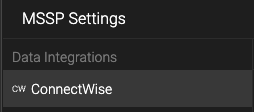
Then, click on ‘ConnectWise’
-
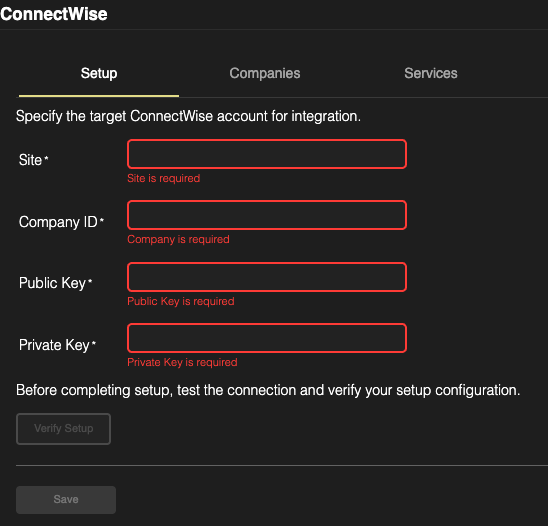
Now, fill in the Site, Company ID, Public Key and Private Key to initiate communication between EnforceDNS and ConnectWise.
-
If you do not know your ‘Site’ or ‘Company ID’, please contact ConnectWise.
The Private Key is only viewable when its first created so you may have to create a new API Key if you no longer have the one you initially created.
-
Once you have your Public and Private API keys, enter them in the appropriate sections in the ConnectWise configuration page in the EnforceDNS UI (above).
-
Click on ‘Verify Setup’.
-
If the setup is successful, you’ll receive the following confirmation:

-
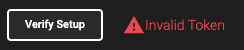
If the setup is unsuccessful, you’ll receive the following error:
-
If you receive an error, please verify that the credentials were entered correctly. If the error continues, reach out to ConnectWise to verify your credentials.
-
Once your set up has been verified successfully, click ‘Save’
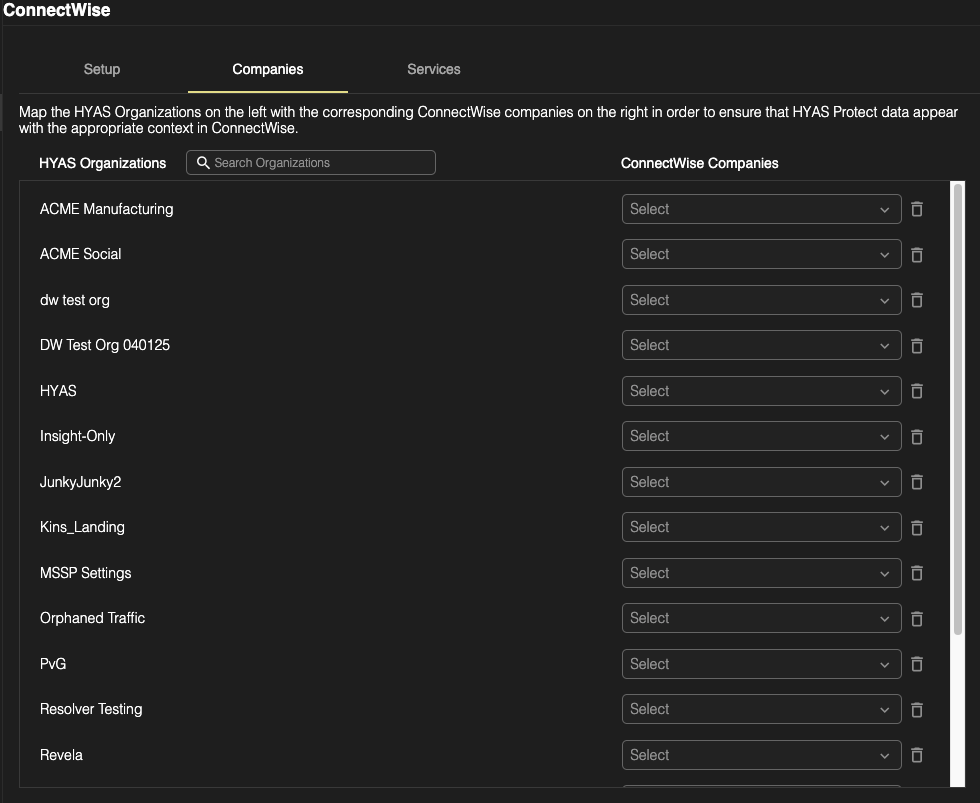
Companies
The next step in the configuration process is to map your EnforceDNS Companies to your ConnectWise Companies. This is done so that when alerts are triggered, they reflect with the correct company.
Companies must be configured separately in both EnforceDNS and ConnectWise before they can be mapped together. At present, there is no functionality to create a company in one platform and have it automatically appear in the other.
-
See the to create and manage users/companies in EnforceDNS.
-
HYAS Companies will automatically populate on the left based on the companies you’ve setup in HYAS.
-
ConnectWise Companies will automatically populate the dropdown list based on those you’ve configured in ConnectWise.
-
As you assign company mappings, the entries are saved automatically.
-
After mapping all of your companies, it’s time to move to the final step, Services.
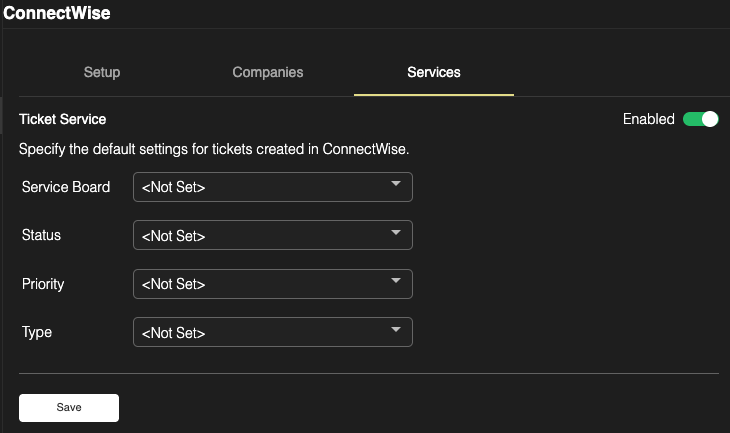
Services
In the Services tab, you can enable ticket creation and configure the information to be included in those tickets.
-
If you wish to enable ticket creation in ConnectWise, toggle the ‘Enabled’ slider to the on position as shown below.
If you do not enable the ‘Services’ and complete the fields noted below, tickets will not be created in ConnectWise.
-
Next, navigate to the four drop downs under the ‘Ticket Service’ section. Each of these drop downs contains information directly sourced from ConnectWise and is configurable via the ConnectWise UI.
For more information on how to create, edit or manage ConnectWise Service Boards, Status, Priority and Type, please visit: https://docs.connectwise.com/
-
Select the desired values for Service Board, Status, Priority and Type.
-
Click ‘Save’
-
You’re ll set! Your ConnectWise, EnforceDNS integration is complete!
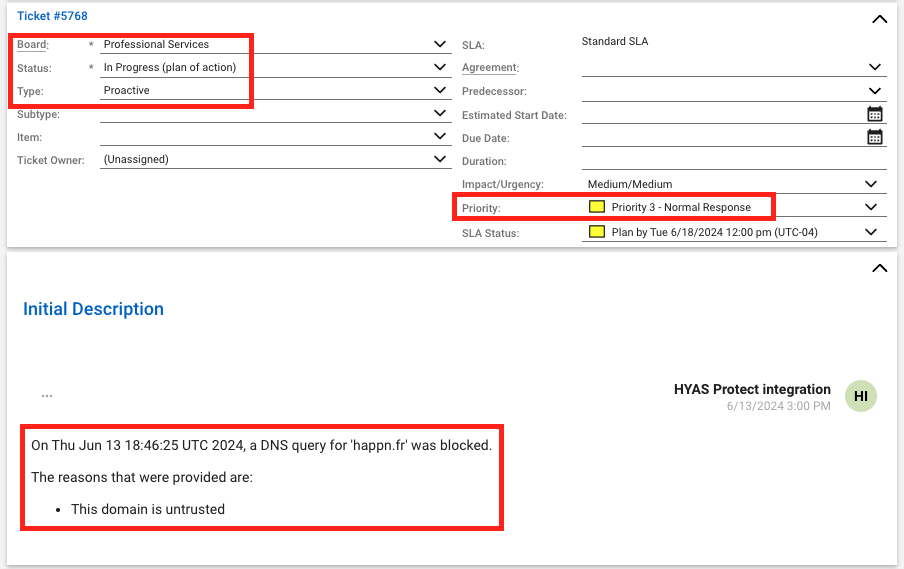
Sample ConnectWise Ticket
Below is what a ticket generated in ConnectWise based off a blocked DNS query in EnforceDNS.
-
Note that the Board, Status, Type and Priority are the values selected in the EnforceDNS UI under the Services section.
-
Under ‘Initial Description’ and ‘Discussion’ (not pictured), you’ll find the date/time stamp, domain, and block reason(s) provided by EnforceDNS.
Troubleshooting
Issue
Tickets are not being created in ConnectWise
Solution
-
Verify API credentials (Public/Private Key)
-
Confirm role permissions are correctly assigned
-
Ensure the service board exists and is spelled correctly
-
Check for firewall or network restrictions
Issue
API authentication errors
Solution
-
Regenerate keys in ConnectWise
-
Re-enter them in EnforceDNS integration settings
Additional Information
Click the following links for additional information on setting up block lists, allow lists, category blocking & rulesets in EnforceDNS.